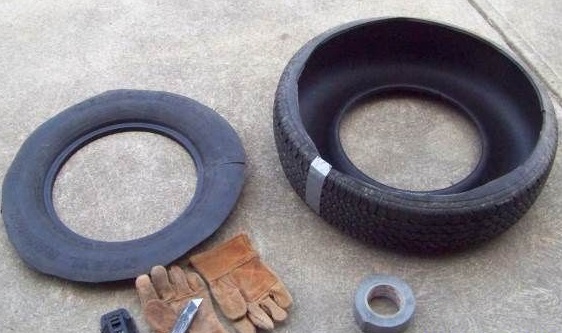
This as a long post but I wanted to share the type of questions i sometimes get.
" Good Morning' Roger. First, thank you for helping to dispel the misinformation about the care & feeding of consumer tires.
My training & work history is in the military & general
aviation world. After a 24 year Air Force career and 17 years with
Cessna in Wichita KS I've learned a great deal about tires. I've also
had a near miss with some tires back in the day.
I had a set of Light Truck tires on our '84 Ford E350 15 passenger van.
Not long after a tire story broke in the news, I looked at the tires installed on
our van. No defects noticed, inflation correct, continue in service. 4
days later, while on the road to KC from Wichita
I felt a vibration develop. I pulled to the shoulder and discovered a
blister in the sidewalk of a rear tire. I installed the spare & the
trip continued without incident.
The following Monday I presented my defective tire to my local tire dealer. He was very apologetic for the defective tire. He
replaced the remaining tires with a set of Bridgestones of comparable
size. The whole incident was handled well.
At the time I couldn't get the one tire that failed. I wanted to
perform an autopsy of sorts. The dealer wasn't having any of that, which
I understand. At the time the problem with the tires was explained to
me that the sidewall de-lamination was caused by
an incomplete cure process. The process was incomplete because a
manager thought the vulcanizing process would run its course even after
the tire was removed from the press. It was later reported that an
inferior compound was used in the process.
So, I guess my question is, in the Light Truck tire incident, was it
improper substitution of a material or a management failure in order to
increase production that lead to the failures? Do Chinese made tires
exhibit similar problems? Can the NTSB outlaw them?
It's all above my pay scale. Just want to see some reliability in RV
tires.
I will continue to recommend your Blog to others in an effort to combat the misinformation surrounding tires.
Reply when you get time. It's a cold Sunday morning here & I'm
working on the second cup of coffee. In this day & age, I don't do
anything in a hurry & my upper arm is getting cold as my sleeve is
rolled up waiting on my vaccine, but we'll survive. Stay
safe, stay warm.
My answer:
Where / how did you get the information that the tire with the sidewall problem had some "inferior" compound?
Without
a lot more data it's hard for me to pass judgment on tires made in the
early 80's. I can however relate a personal experience that I have
written about previously. This may shed some light on tire quality.
By late
2000 my primary job responsibility had become doing forensic tire
inspection and analysis. I came across one almost new (weeks old)
passenger tire with the steel in the belt having lost all adhesion to
any rubber. There was only one tire and at the time no report of other
similar tires. Many times single tire issues get set aside as a "single
data point" is hard to establish any trend. A few weeks later I was
presented with two more tires with belt issues and upon conducting an
autopsy discovered these tires had steel in one of the two belts, BUT NOT BOTH, having
no adhesion to the rubber. The other belt had normal levels of
adhesion. Recalling the single earlier tire I dug deeper.
Eventually,
after some investigation and some test results from the chemistry lab,
it was confirmed that a single batch of approximately 145 lbs of the rubber had been improperly labeled in the factory and built into
about 150 tires. I notified the VP of Corporate QA and a recall was
initiated with the permission of NHTSA (the agency like NTSB but dealing
with automobiles, not commercial vehicles such as buses or airplanes).
The recall covered some 6,000 tires as the effort required the recovery
of all tires that were cured the week when the factory mistake was
made.
Technically we knew that with only 145 lbs of rubber
involved and the specific process used in that plant that a maximum of
150 tires could have been affected but since tires are recalled based on
the DOT serial and all tires made in any one week carry the identical
serial that was the only option. It turns out that most of the tires
were still in the warehouse which made completing that recall easier as
many times even when recall notices are published a significant portion
of the public does not pay attention.
Your
suggestion that some inferior material was intentionally used in your LT tires just doesn't seem plausible as NHTSA would have ordered a
recall of all suspect tires if there was data that supported the idea
that some substandard material had been used.
In
modern tire manufacturing, most rubber compounds are used in many
different sizes and types of tires. I would say that the sidewall rubber
in the Light Truck tire would probably have been used in most if not all LT
tires being made at that time which would have involved millions of
tires.
It is also true that tire store dealers
do not get detailed training in tire forensics so sometimes they tend to
simplify the explanation for a problem. When tires are "adjusted" and
replaced however those tires are sent to be inspected, in detail, by
engineers with the necessary training and experience. If manufacturing
errors, as found in my example, are confirmed, appropriate action is
taken as there are serious financial fines for knowingly allowing tires
that do not pass DOT requirements to be sold or used.
All
tires sold for highway use are certified by the tire manufacturer to be
capable of passing the DOT test requirements and the data I have seen,
including a number of tires made in China, shows that the tires meet the
DOT requirements. The "China Bomb" concept is a combination of improper
use and improper understanding of statistics. It is a known fact that a
majority of tires on RV trailers are overloaded. Also, some 90+% of the
tires applied to RV trailers were for a number of years were made in
China. With these known facts is it any wonder that there were tire
failures on RV trailers and that most of those failed tires had been
made in China? Many people jumped to the incorrect conclusion that since
very few tires failed on their passenger cars or pick-ups and that the
tires on their cars and pick-ups were not made in China. That the
China-made tires must somehow be "defective" even while never being able
to identify any specific "defect".
A
side issue. You mentioned a desire to
"perform an autopsy of sorts" immediately raises the question in my mind
of how and what you thought you would do when doing your first tire
autopsy? I suggest you read these blog posts
where I mention "Autopsy" and ask yourself if you would have noticed or
been able to identify the evidence I pointed out in these examples. And
if you had noticed the details do you think you would have reached the
same conclusions I did?
##RVT990