

Yes, some rubber valve stems have a metal center and some valves are all metal except for a rubber gasket. The metal part of valves is almost always brass. Sometimes Nickle plated to look like chrome or to match aluminum wheels.
 The two valves on the left are "Snap-In" rubber valves. The two on the right are "Bolt-in" metal stems. By "Snap-In" we mean the valve is installed into the hole in the wheel by pulling on the threaded part of the brass until the small rubber ridge "snaps" through the hole.
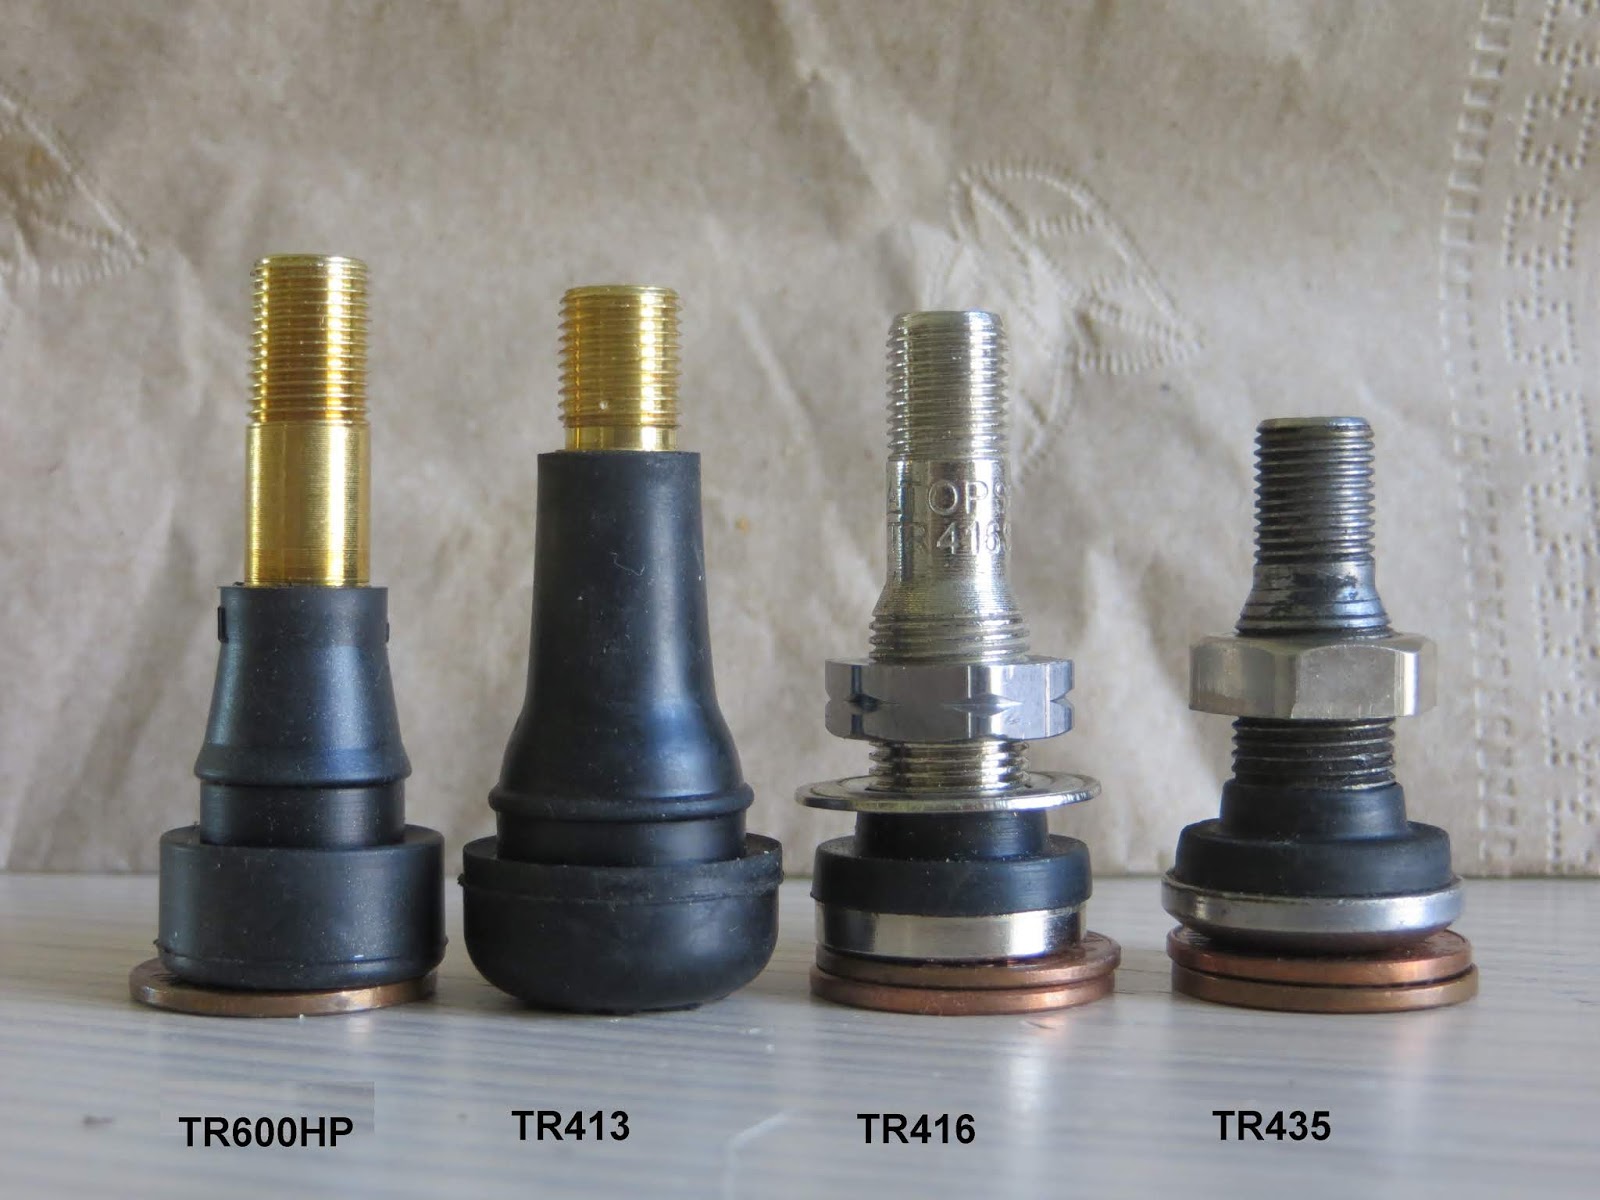
The best way to know for sure is to look for a nut that "bolts" the stem to the wheel. I would suggest a TR416 or similar as seen HERE from Auto Zone. O'Riley's parts stores have a similar short stem. You should be able to find similar in almost any auto parts store. These metal stems come in many lengths from less than an inch to 2" or longer (different lengths have different TR part numbers). The hole in your passenger, trailer or light truck wheel is most likely 7/16" Old VW wheels were 5/8" All 19.5 and 22.5 wheels should have come with a metal bolt in valves but those use the 5/8" rubber grommet/O-ring. Many metal stems sold at retail, come with two different rubber gaskets, one for each size hole. The gasket is just a snug fit and should just push into the wheel hole.
Note the nut has a torque spec of 25 - 45 INCH Pounds so do not over tighten the nut. I have found that a regular 9/16" wrench is just fine and you do not need a big ratchet wrench to tighten the nut.
Keep the stem short to lower the chance of the TPMS being knocked off if you get near a curb. There are some unique wheels that may require a bit longer stem to allow you to attach your TPM sensor. I suggest you have the sensors available when you install the bolt in stems to confirm sufficient clearance.
The main reason for metal stems when running TPMS is to prevent vibration of the stem which can fatigue the rubber stem.

The main reason for metal stems when running TPMS is to prevent vibration of the stem which can fatigue the rubber stem.

 Each Fall, when I remove my TPMS for the Winter, I place metal caps on my stems. I will admit that one year I didn't do that and the valve core had a very slow leak but I ended up with a tire being damaged because it lost air over the 7 months between when I parked and when I was getting ready to go traveling.
I have a couple of posts that focuses on the valve cores. One on why they leak.
One detail is how to know how tight is enough for your valve cores. Over-tight can cause the small gasket to deform and even split and under-tight will result in a slow leak. After 40 years of installing valve cores I consider my fingers to be close to "calibration" but it would be better if you followed a specific procedure.
I did a test that may help. The spec for valve core torque is 1.5 to 5.0-inch pounds MAX but I don't expect you to run out and buy a special inch-pound torque wrench as seen here.

To help you I devised this test. Using the test fixture I made when running my TPMS comparison I loosened a core till it leaked as seen here.

So I would suggest that you can simply tighten a core till the leak stops then rotate 1/2 turn more.
Here are sample core tools.

I hope this helps you understand a bit more about valves and valve cores.
##RVT889
##RVT889
No comments:
Post a Comment
Thanks for your comment. We look at each one before posting to keep away the spammers.